CentOS7系统安装Redis5.0.5并安装PHP-redis扩展 | 暮云归

更新:2020年12月15日 20:20 PHP 阅读(0)
VM虚拟机,CentOS7系统,已安装完整的LAMP。PHP版本为7.3.25(PHP7+)。
现在的目的是为该系统安装Redis服务(Redis5.0.5),该版本在当下是比较新的稳定版。
还有就是为我们的PHP安装redis扩展(可通过phpinfo()函数看到redis扩展的具体信息)
VM虚拟机,CentOS7系统,已安装完整的LAMP。PHP版本为7.3.25(PHP7+)。
现在的目的是为该系统安装Redis服务(Redis5.0.5),该版本在当下是比较新的稳定版。
还有就是为我们的PHP安装redis扩展(可通过phpinfo()函数看到redis扩展的具体信息)。
多说一句:Redis是redis服务,php-redis才是PHP的扩展功能哈。这是两回事。

第一步:下载redis5.0.5

# cd /mydata
# wget http://download.redis.io/releases/redis-5.0.5.tar.gz
 
最后出现
100%[==============================================================>] 1,975,750   1.06MB/s   in 1.8s   
下载完成


第二步:安装redis5.0.5

1、安装到/usr/local/redis5.0.5/目录下
# cd ~ //我的理解,这里直接进入根目录(就是登陆成功后自动进入的那个目录)
# tar -zxvf redis-5.0.5.tar.gz -C /usr/local/    //直接解压到/usr/local/目录下


 2、编译安装

# cd /usr/local/redis-5.0.5/
# make            //或者 make MALLOC=libc  
 
最后出现
Hint: It's a good idea to run 'make test' ;)
make[1]: Leaving directory `/usr/local/redis-5.0.5/src'
说明编译成功
 
继续
# cd ./src/             // 或者不用进入此目录,直接执行make install,也会自动进入此目录,
# make install          // 将此./src目录下的文件加到/usr/local/bin目录
最后出现:
Hint: It's a good idea to run 'make test' ;)
    INSTALL install
    INSTALL install
    INSTALL install
    INSTALL install
    INSTALL install
make[1]: Leaving directory `/usr/local/redis-5.0.5/src'
 
OK安装完成
此时查看
# ls  -al /usr/local/bin/
已经存在了:
......
-rwxr-xr-x 1 root root 4366592 May 24 18:40 redis-benchmark
-rwxr-xr-x 1 root root 8111800 May 24 18:40 redis-check-aof
-rwxr-xr-x 1 root root 8111800 May 24 18:40 redis-check-rdb
-rwxr-xr-x 1 root root 4806824 May 24 18:40 redis-cli
lrwxrwxrwx 1 root root      12 May 24 18:40 redis-sentinel -> redis-server
-rwxr-xr-x 1 root root 8111800 May 24 18:40 redis-server

 
如果make 报错,查看是否安装gcc  如果没有安装,使用 yum -y install gcc gcc-c++ 安装即可

3、检测是否安装成功

# cd /usr/local/redis-5.0.5/src/
# ./redis-server

 
若是看不到下面这图,还可以尝试这个命令

# redis-cli shutdown   //关闭正在运行的redis服务,因为redis可能在后台运行
# redis-server            //开启redis服务


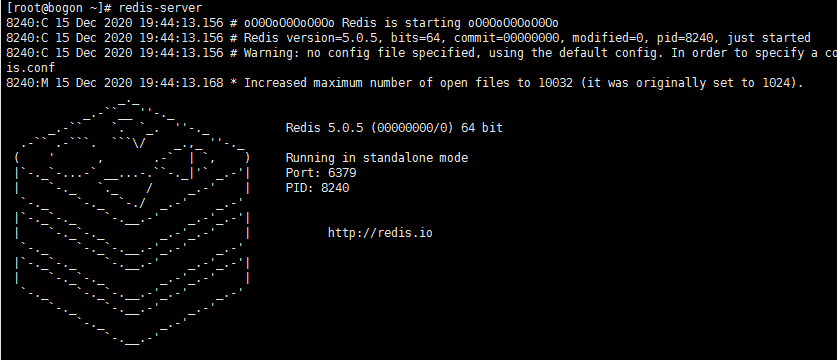
看到这个黑乎乎的盒子,那恭喜你,安装成功了。可以通过“ctrl+c”命令退出了。


第三步:配置redis服务器(默认无密码)

1、配置以后台方式启动,对于vim操作不熟练的,建议通过桌面进去修改,保存
# vim /usr/local/redis-5.0.5/redis.conf
大约136行
daemonize no   将值改为yes 保存退出

 
2、指定redis.conf文件启动

#cd /usr/local/redis-5.0.5/src/
# ./redis-server   ../redis.conf                //临时启动服务器,(如果上一步不修改配置文件,这里加个& 也表示后台启动)     
出现
4821:C 24 May 2019 19:33:02.970 # oO0OoO0OoO0Oo Redis is starting oO0OoO0OoO0Oo
4821:C 24 May 2019 19:33:02.970 # Redis version=5.0.5, bits=64, commit=00000000, modified=0, pid=4821, just started
4821:C 24 May 2019 19:33:02.970 # Configuration loaded
 
说明启动成功
 
测试:
# ./redis-cli 
127.0.0.1:6379> set username 'niuxitong'
OK
127.0.0.1:6379> get username
"niuxitong"
127.0.0.1:6379>

 
上面的set的值和get的值相同,说明redis是正确的哈。

3、设置开启重启

关闭redis服务进程

# ps -aux | grep redis        //查看redis进程
root      4822  0.0  0.7 153892  7640 ?        Ssl  19:33   0:00 ./src/redis-server 127.0.0.1:6379
root      5557  0.0  0.0 112708   972 pts/0    R+   19:41   0:00 grep --color=auto redis
使用 kill -9 命令杀死此进程
# kill -9 4822
# kill -9 5557
 
# 删除此进程文件(如果有)
# rm -f /var/run/redis_6379.pid       #只要启动过,就会有此文件存在
 
# netstat  -nlpt    查看端口号是否还存在6379


设置开启重启

# cd /usr/local/redis-5.0.5/
# mkdir /etc/redis                        //在/etc目录下新建redis目录
# cp ./redis.conf  /etc/redis/6379.conf         //将redis.conf 文件复制一份到/etc/redis目录下,并命名为6379.conf    
# cp ./utils/redis_init_script /etc/init.d/redisd    //将redis的启动脚本复制一份放到/etc/init.d目录下,并重命名为redisd
# cd /etc/init.d/
# chkconfig  --add  redisd
# chkconfig  redisd on  
# 启动redis服务器
# service redisd  start
 
#任意为执行
# redis-cli 
即可进入
# service redisd  stop 关闭redis服务


第四步:扩展:配置redis密码服务

1、配置redis密码为niu123456
# vim /etc/redis/6379.conf
# 大约507行  找到 # requirepass foobared
 
去掉前面的#号,并修改为 requirepass niu123456


上面的“niu123456”就是你设置的redis密码,可以改成你自己想要的,但一定要记住,后面要用到,以后在开发中使用这个redis服务的时候也用得到。 


2、修改启动脚本
# vim /etc/init.d/redisd
大约39行,在执行停止命令的程序中
把 
$CLIEXEC -p $REDISPORT shutdown 
修改为:
$CLIEXEC -a "niu123456" -p $REDISPORT shutdown


3、客户端访问需要设置auth 密码

[root@localhost ~]# redis-cli 
127.0.0.1:6379> auth niu123456
OK
127.0.0.1:6379>


五、安装php-redis扩展

1、PHP官方下载redis扩展
http://pecl.php.net/package/redis 
# cd /mydata
# wget http://pecl.php.net/get/redis-5.0.2.tgz   --下载stable稳定版
最后出现:
100%[==============================================>] 
下载完成


2、使用phpize编译安装
通过查找,我们的phpize位于/usr/local/php/bin/phpize 下,并且php-config也位于此目录下

# tar -zxvf redis-5.0.2.tgz
# cd ./redis-5.0.2
# /usr/local/php/bin/phpize            //使用phpize生成安装文件
出现:
Configuring for:
PHP Api Version:         20180731
Zend Module Api No:      20180731
Zend Extension Api No:   320180731
 
这时此目录生成了configure文件和其它一些文件
 
 
# ./configure --with-php-config=/usr/local/php/bin/php-config     指定PHP配置路径
最后出现
......
checking whether to build shared libraries... yes
checking whether to build static libraries... no
 
creating libtool
appending configuration tag "CXX" to libtool
configure: creating ./config.status
config.status: creating config.h
 
继续:
# make 
出现:
......
See any operating system documentation about shared libraries for
more information, such as the ld(1) and ld.so(8) manual pages.
----------------------------------------------------------------------
 
Build complete.
Don't forget to run 'make test'.
 
继续:
# make install
出现:
Installing shared extensions:     /usr/local/php/lib/php/extensions/no-debug-non-zts-20180731/
 
查看PHP扩展目录
# ll /usr/local/php/lib/php/extensions/no-debug-non-zts-20180731/ 
出现:
-rwxr-xr-x 1 root root 3584228 May  7 01:12 opcache.a
-rwxr-xr-x 1 root root 1976936 May  7 01:12 opcache.so
-rwxr-xr-x 1 root root 2390504 May 27 16:07 redis.so         //redis.so就是我们要的PHPredis扩展
 
OK安装完成


3、配置php.ini

# vim /etc/php.ini            //PHP配置文件
在最后一行添加如下一行(和windows下的配置有区别,请注意):
 
extension=redis.so
 
# service php-fpm  restart    //重启php
# php  -m                     //查看PHP扩展


最后,依然推荐使用万能的phpinfo()函数查看php-redis扩展是否安装成功。注意配置好了需要重启apache服务器,否则看不到效果。
 

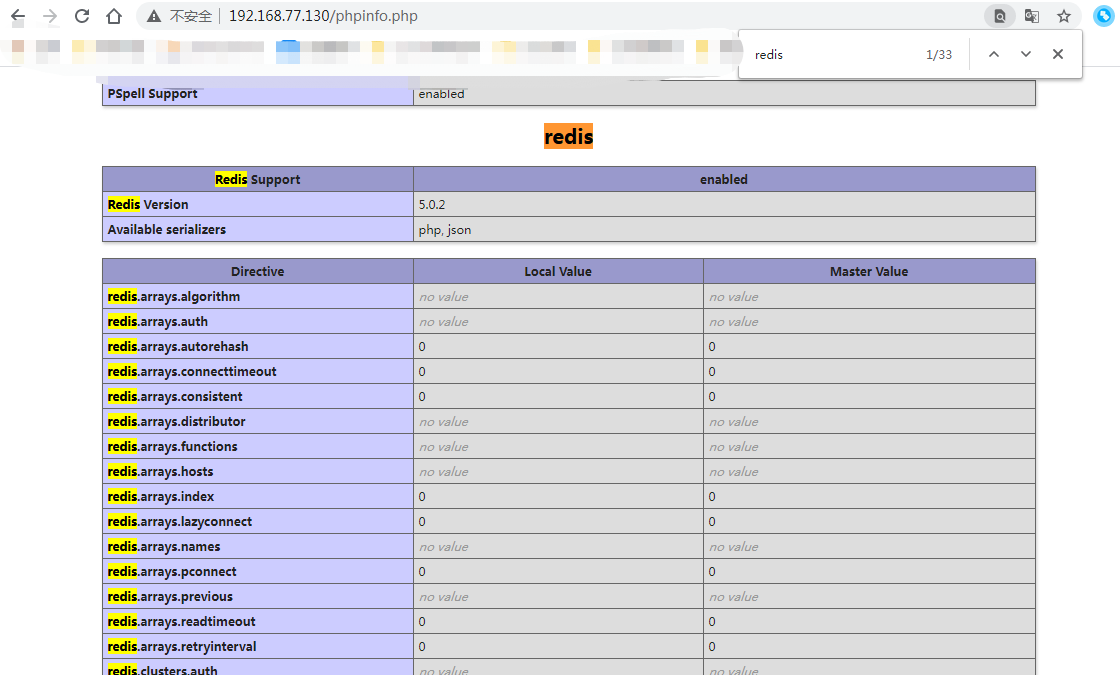
若是通过phpinfo()函数看到如上截图所示的信息(类似的信息),那说明大功告成。

以上信息真实可靠,本人参考【暮云归】【https://blog.csdn.net/niuxitong/article/details/90505794】 一文,确实安装成功了,在此向“暮云归”表示感谢。
温馨提示:以上少部分信息与原文有差异,插图都是本人安装成功后的截图。


感谢阅读本文,若本文对你有所帮助,不妨将其推荐给好友,与好友一起分享。
文章仅做学习交流使用,若您认为文章存在侵权或不合法行为等,请及时联系我们。
文章之版权归其合法拥者所有。转载原创内容无需联系本站站长,请注明原文出处及链接。
#原文:[默认] https://blog.csdn.net/niuxitong/article/details/90505794
更新:2020年12月15日 20:20 PHP 阅读(0)

阅读延伸

CentOS7系统安装Redis5.0.5并安装PHP-redis扩展 | 暮云归

VM虚拟机,CentOS7系统,已安装完整的LAMP。PHP版本为7.3.25(PHP7+)。
现在的目的是为该系统安装Redis服务(Redis5.0.5),该版本在当下是比较新的稳定版。
还有就是为我们的PHP安装redis扩展(可通过phpinfo()函数看到redis扩展的具体信息)

[原创]Centos7系统为php7安装memcache扩展 | 十年铸剑

这篇文章主要记录本人安装的历程,若有需要,希望能对大家起到一点作用,哈哈。
这是在虚拟机中安装memcache扩展,虚拟机安装的系统是CentOS7,已正常安装了PHP7.3.25.